
First of all, stay tuned! The photos, recipes and a video from my wonderful POM WONDERFUL party will be coming up this week. The dinner party is tonight and I have pulled out all the stops! I can't wait for you to see it.
Second, yesterday was the annual Christmas Shopping Extravaganza at my mother's church. We had a booth there selling some of the items that I made and cookbooks. This was an emourmous event by the way...95 vendors! There were probably around 5000 shoppers that came through.
The great gingerbread project of 2010 was to be the focal point of our booth. Granted, I try to make one every year but I usually don't make it till after Thanksgiving. However, this year I made it early. I'm just going to post pictures and let them speak for themselves. LOL...trust me, unless you are nuts like me, you won't be interested in the recipe or the instructions!!!

Here it is...in all of it's glory; standing 3 feet tall and weighing in at around
thirty five pounds.


back view...you can see, it is lighted -both the cottage and the tower. The "rocks" are chocolate rocks and the white capped waves are royal icing. The "sand on the cliff face is brown sugar adhered to royal icing while its still wet.
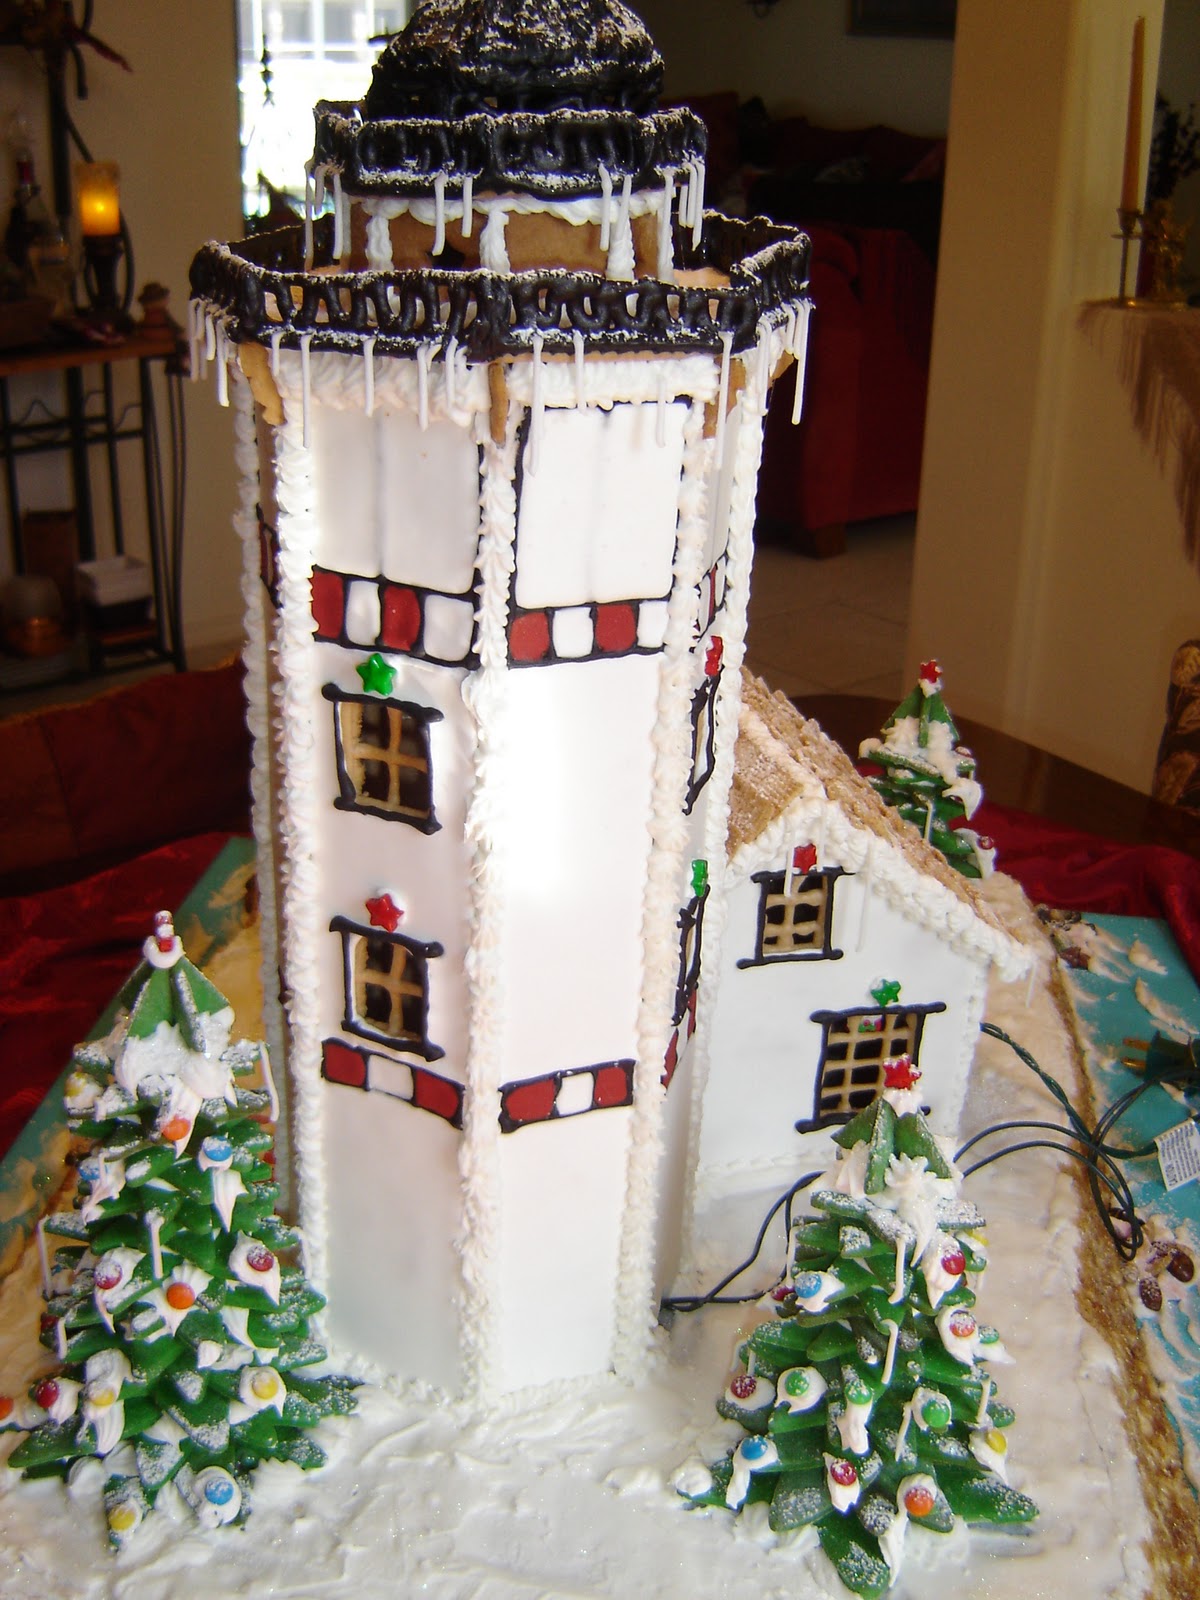
The railing and light cage at the top of the tower are made from piped gingerbread that had to be first tinted black. The process is a MESS! You take some of the already made dough (the dough for the entire piece is made at once and then smaller amounts are tinted or otherwise manipulated as needed), chuck a little piece in your blender with a spoonful of warm water and gel black food coloring paste. Add water one spoonful at a time until dough is the consistency of thick icing. Fill pastry bag fitted with a writing tip (sizes vary depending on what you are piping) and go to town! The easiest way to pipe your pieces and know that they are going to fit properly is to slide the pattern piece under a sheet of waxed paper and then pipe over it; rather like tracing a drawing. You then slide the patter piece over to the next clear area of the paper and pipe some more. Or you can just do like me and lay the pattern piece to the side for reference and freehand it. This isn't my first time at this particular rodeo however! The railings and light cage pieces are baked right on the waxed paper. The open window panes have also been filled with piped gingerbread BEFORE the pieces are baked.

Here is a closeup of my little cliff face with the rocks and some white caps breaking against it.

This close up of the tower shows how smooth the royal icing coat is on the buildings. My hand is NOT that steady! In order to "whitewash" an entire building you need to use what is known as "the flood technique" It's like coloring inside the lines really. It must be done BEFORE assembly.

The pieces are first outlined with thick royal icing in a pastry bag fitted with a number 1 writing tip. When flooding with dark colors, such as the red checks, do the colors FIRST. Allow to dry for 20 minutes before proceeding. When ready to begin coloring in the rest of the piece, place some royal icing in a small bowl and add water a spoonful at a time to reach a pourable consistency. Too thin will result in a frosting that is too wet though. It will still set but you'll be able to see through it AND it could warp your pieces from the extra moisture. When flooding, frosting should be about the consistency of corn syrup. It is also important to note that you are NOT painting the frosting onto the pieces...you are merely coaxing it into the corners. I try to pour evenly and as close to the lines as I can and let it spread how it will and then use a silicone pastry brush (so it does not leave streaks) to push it into the corners that did not get covered. You must do this within a couple of minutes of pouring however. It will form a "skin" within just a few minutes and if you touch it once the skin forms it will leave a bumpy imperfection in the coating. It helps to complete all detail work while the pieces are lying down in this manner. Especially on tall pieces like the tower of the lighthouse. I let flooded pieces dry for a FULL 24 HOURS before assembling them. You want that coating to be completely cured. By the way, this technique will also lend a bit of extra stability to really tall pieces of "naked" gingerbread.

Here is a close up of the piped railing and tower pieces. ALWAYS make twice as many as you need when doing delicate piped pieces like this. I guarantee that you will break several. The do not stick to the parchment at all when baking but they are very thin and brittle. It does not take much to break them. Here the cooled pieces are just stacked together on an extra sheet waiting for me to assemble.

This is one of the coolest techniques for making more realistic evergreens. Begin with a set of nesting star shaped cookie cutters. My set has four sizes. Tint some of the basic dough green with gel food dye. It's brighter and truer color than the liquid stuff AND it does not thin down your dough. You'll definately want to wear rubber gloves for this and simple knead the coloring in like you are playing with playdoh! Roll out the dough onto sheets of floured parchemet and then cut stars. The amount you'll make will depend on how many and how tall you want your trees. I had four trees on this piece. Two are taller and have around 25 cookies total. The other two have around 15. Make at least 3 or 4 of the largest sized star for the base of the tree and just proceed from there, making several of each size. BEFORE you bake the cookies, use a straw to punch out a hole in the center of each. Construction dough has no levening so it does not spread or rise. Your hole will not close up! Once baked and cooled you simple insert a bamboo skewer into the base (in this case mine was styrofoam blocks under all that sugar) and simply slide the cookies onto it in descending size order. Make sure that you turn each cookie a quarter turn so the points of the stars are between the points of the previous star. Otherwise the tree doesn't "fan" out. Glue them together as you go with blobs of royal frosting piped around the skewer before the next cookie is inserted. Finish with extra frosting for snow and add "colored lights" while the frosting is still wet. Allow to dry overnight and then snip off the skewer at the top of the last cookie. Tree tops are made with four triangles cemented together with frosting.

To make the snow "glisten", it has been dusted with micro fine edible glitter.
All in all, I am pleased with this year's project.

Here is my table at the bizzare. I had to finally put a "for display only" sign on the lighthouse!


absolutely beautiful!!! That is awesome!! You did an amazing job!!!
ReplyDeleteHey Jill... this one is even more amazing than the first one I saw when you were still in Orlando!! I love it!
ReplyDeleteStunning, Jill! I could look at these pictures all day!
ReplyDeleteThat is a fantastic display. Well done!
ReplyDeleteThanks everyone!
ReplyDeleteJust amazing detail on this!! I have to make the time this year to create at least one gingerbread house. Thanks for sharing your tips.
ReplyDeleteBeyond amazing...you are such a talent :)
ReplyDeleteAmazing!
Awesome gingerbread creation! I know the amount of time and effort that goes into such a piece of sculpture! It is beautiful :)!
ReplyDeleteWow! You are so talented! I could never create something like that, looks beautiful. I can't wait to see your POM entry. Please let me know so I can vote for you this time:) Have a great day and don't work so hard, hehe.
ReplyDeleteDid u make this, Jill? What an impressive job!
ReplyDeleteIt's been a while since we last exchange words. Kudos to u on this one!
Unbelievable. What a gorgeous post! If I wasn't in a Christmassy mood before, I am now!
ReplyDeleteI am so impressed with your talent. Those babies are Hard to make and yours is just stunning. I hope you sold a lot, and I can certainly see why you'd need to put a "for display only" on that lighthouse.....so many people would probably have loved to have taken it home!
ReplyDeleteWow! This gingerbread house is incredible! You put so much work into it, amazing!
ReplyDeleteHow beautiful. I want to send this to my aunt (we used to make some very simple gingerbread houses together :-) Thank you for sharing. You have some serious talent!
ReplyDeleteYou are amazing! xoxo Megs
ReplyDeleteYour gingerbread creation is just awesome! You not only bake and cook well but you are incredibly creative. Wish I could have seen it in person.
ReplyDeleteThis is stunning. Thanks for the inspiration!
ReplyDeleteI'm trying to decide how to do the walls of my "castle" - might try the frosting technique you did, or I might use broken white chocolate pieces (like stone) with tan frosting mortar.
At the end of the day I'll probably mix methods...
Thanks for sharing web promotion such a wonderful vegan gingerbread cookie recipe! They sound delicious! Sorry to hear they frustrated you...I know all too well how that goes with baking sometimes lol..Narconon Fresh Start
ReplyDelete