Friday, April 30, 2010

I Needa Granita

Aside from feeding Lucky and squishing my rapidly softening lemons down into their salty juices, I haven't done much cooking today.  I spent most of the day editing recipes and formatting them for submission.  I usually make three or four dishes everyday and photograph them though so I can afford to take a mental health break now and again.

The lighting has been bad the last couple of days...a little too overcast for good picture quality. I was hoping today would be a bit brighter so I could retake the photos of the granita from yesterday but no such luck.  These photos are not quite as bright as I'd like them to be but they are ok for the blog.  I'll have to retake them for the cookbook photo though. 

This granita idea actually started with Stella (The Witchy Kitchen) and her Rosewater.  I had a bottle that I bought quite some time ago and never opened.  Since I was fresh out of Eye of Newt, I figured Rosewater would make a passable substitution!

I use my juicer just about everyday and sometimes the combinations of fruits and or veggies is particularly tasty.  Yesterday, I needed a quick sweet pick-me up so I chucked a couple of ripe kiwi and a big bundle of red globe grapes (seeds, stems and all) into the juicer.  The resulting juice was a little oddly colored but it was so delicious...tart, sweet and tangy all at the same time...lovely!  I got to thinking that this would make a marvelous granita so I added a bit of raw blue agave syurp and just a splash of rosewater.  WOW...what a flavor!  The agave is not so much for sweetness as it is for helping the granita to freeze "fluffy". 

I wish the light was better on the pictures so you could appreciate just how lovely and light this was but ah well...I'll have to make it again anyway so I'll get better photos next time.

Kiwi, Grape and Rosewater Granita


This is just so simple its not really even a recipe.  I do suggest using freshly juiced fruit as opposed to buying bottled juices though.  This tastes like pure, sweet fruit...NOT sugar!

I juiced 5 large kiwi and one huge bundle of red globe grapes (about half a pound of grapes) to make 2 1/2 cups of juice.  Add agave to your own taste.  I only used about 2 tablespoons.  Then I whisked in 3/4 of a teaspoon of rosewater.

Pour the mixture into a large glass casserole dish and place in the freezer.  You will want to take the granita out about every 35-45 minutes and scrape it with a fork to create the fluffy ice crystals that is charateristic of this dessert.  Stirring doesn't do the job!  Repeat as many times as needed until mixture is completely frozen and you have nice fluffy ice crystals.

Spoon into serving glasses and garnish with a slice of kiwi and a half grape.  Serve immediately.   There are four servings on the tray but I had enough granita for four more glasses.  I believe these are two ounce cordial glasses. 


Thursday, April 29, 2010

Preserved Lemons and Sourdough Starter

Okay...can anyone tell I've had a visit from the DIY fairy today?  I always find myself lacking when it comes to preserved lemons because...well, they are just hard to come by in this neck of the woods (NECK being the operative word here).  Maybe theres a Moroccan or Middle Eastern Market around here somewhere but if there is, I sure haven't found it.  I did NOT like living in Orlando but I will say this...you could find just about anything you wanted there.  I'm on a strip of land between the Caloosahatchie River and the Gulf of Mexico...a sitting duck for a hurricane mind you...and if I went into the market and asked where the preserved lemons were, I'm sure they'd look at me like I had three heads and a tail. 

So I did a little surfing to find out if I could make them at home without giving myself botulisim and it turns out that I CAN!  The method is pretty much the same no matter where you read it...make cross cuts in lemons...pack with salt.  The spices added to the jar vary from none at all to bay leaves, hot chili peppers and a variety of aromatic seeds or pods.  Since I couldn't find a general consensus on what was "authentically Moroccan", I decided to improvise with what I have on hand...necessity being the mother of invention!

I had bay leaves but I just don't like them much...at least not dried.  I do like fresh ones but I don't have any of those.  One of my favorite things about Moroccan food is the complex blend of spices...sweet, savory, spicy, bold, tangy...all in one bite!  So a raid of the spice pantry provided me with my OWN quirky mix in which to preserve my lemons.

Preserved Lemons


This happens to be a mixture of broken cinnamon sticks, pink peppercorns and corriander seeds.

You'll need a jar large enough to accomodate the number of lemons you wish to preserve.  Wash and sterilize the jar.  With all this salt and lemon juice, you could probably dissolve a car battery but just don't take any chances.  I don't want it said that you got a recipe for Fungi Jungi from ME!

Scrub the lemons with a brush and veggie wash ( I use Dr. Bronner's pure castille peppermint soap...20 drops in a 10 ounce squirt bottle of water).  Since you're going to be using the lemons peel and all I do recommend buying organic.  Make cross cuts (like you are going to quarter the lemon lengthwise) through the lemon but do not cut through. 

I used coarse kosher salt to pack the cuts in my lemons...at least a tablespoon per lemon.  Just hold the cuts open and pack with salt.  Place the salt packed lemons into your clean glass jar and press down with a wooden spoon to get some of the juices extracted.  Add the spices or seasonings of choice (or not). 

Put the lid on your jar and place it in a cool place away from direct sunlight.  I just have mine on the back of the counter.  Everyday for 2-3 days you'll want to open the jar and press down gently on the lemons with a wooden spoon.  If they are not particularly juicy, add some fresh lemon juice.  When the lemons are softened and completely submerged in liquid, you may refrigerate them. 

You should allow them to cure for 20 days before using them.  They should keep for about 6 months in the fridge providing you don't cross contaminate the contents of the jar by sticking a fork with some kind of food on it down in there.  Just thought I'd throw that out there because I'm surely not the only woman whose husband has RUINED the sour cream or mayo doing that!


Heres an aerial view of my jar...wide mouth works best.  You can see the pink peppercorns and some of the corriander seeds.  The cinnamon sticks have fallen though to the bottom.  I tossed another tablespoon of salt over the top of the last lemon just for good measure!

When your lemons are finished curing, you'll want to rinse a lemon when you use it to remove the extra salt...but don't rinse the whole jar...only what you're going to use.

The DIY fairy also put a little bug in my ear about a sourdough bread starter today.  My grandfather had this horrid looking clay pot with a lid that sat wayyyyyyyyyy in the back of his fridge for the duration of my childhood...and beyond.  If you opened it there was a layer of sour, smelly water on top of another layer of GOO.  As a child who got into EVERYTHING and to whom nothing at the GP'S house was EVER offlimits, I remember sticking my finger in that stuff and licking it because I was SURE my grandfather was hording some delicious treat in there.  You know, sourdough starter is probably one of the worst tasting things on the planet!

I learned from a very early age though, that what he MADE from that smelly goo was one of the BEST things on the planet!  My grandfather made sourdough rolls that were so good they would make your tongue want to slap your brains out!  He was known (and revered) all over Knoxville Tennessee as a baker to be recconed with...especially when it came to those rolls.  We literally stood by the stove like pigeons on fence posts waiting for him to pull those big sheet pans full of pillow-soft rolls out of the oven...and then paint the tops with obscene amounts of melted butter!  My mouth is watering.  I WISH I could make rolls like that but his were just incomparable.

However, I DO have his recipe and from time to time over the years I will attempt to make them.  I've never gotten them to taste like Papaw's rolls but they are still good.  Maybe it was his starter?  Who knows how old that thing was!  Anyway, today I decided I was going to start a new one and see how long I can raise it.  I'm going to think of it as another pet that must be fed and watered and taken out now and again.  I'm thinking of naming it Lucky after my late grandfather's late basset hound.  That dog just plain old STUNK all the time but he was a good boy!  HA...that way anytime anyone asks me to make sourdough bread I can say..."sure...do you want to get Lucky?"

Paul Arnold Scates would roll over in his grave if I cheated and added yeast to boost this starter along.  Equal parts water and flour in a clean glass jar or other non-metal containment device.  Make sure to use a clean jar...we don't want any streptacoccolibadjuju competing for real estate with our new colony!


This is a two quart jar in which I've mixed 2 cups unbleached all purpose flour with 2 cups warm distilled water.  I used a silicone coated whisk (no metal) to mix out the flour lumps.  This jar does have a metal lid but its unlikely that your starter will bubble up high enough to reach it in a jar this size. 

Now, tomorrow and each day after that for the next 3 or 4 days I'm going to have to feed Lucky because he'll have eaten up all the sugars and unless I give him more he won't grow.  I'll stir well and then remove about half the contents of the jar.  Replace it with 1/2 cup warm distilled water and 1/2 cup of flour.  I'll keep Lucky nice and warm by letting him rest in the microwave.  NO...I'm NOT microwaving my pet!  He's just sleeping in there because it's dark and warm.  After about 3-4 days, Lucky is going to start smelling a little ripe...kind of like a spilled beer.  From this point on, I'll probably want to put in hybernation (fridge) until I need him.  When he's hybernating he only needs to eat once a week...same proceedure. 

The liquid and the flour will inevitably seperate.  This water is called HOOCH...being from Tennessee, I tend to think of this as a bootlegger's term.  That probably isn't far from wrong.  Just stir the hooch back into the flour before using the starter.  When you are ready to bake with it, you'll need to make a sponge with some of your starter, flour, water and sugar.  You may or may not want to use yeast to boost your dough.  Just be aware that sourdough starter by itself will require much more rise time.  My grandfather always made his sponge 24 hours before he made the rolls.  I will post the recipe and method later, after Lucky has matured.

I may even breed Lucky with a nice little wheat-colored number...they would produce healthy offspring!

Tuesday, April 27, 2010

Creamsicles and Conversation

Yesterday was pick up day for the co-op and I came home with a booty fit for a pirate.  Oh wait...is that booty or bounty?  I guess it depends on the pirate eh?  Ok...I need to get Johnny Depp OUT of my head and FOCUS on the fruits and vegetables! 

I've been scouring the local grocery stores for a couple of weeks now looking for some organic Swiss Chard...to no avail.  I hit the jack pot this week with the co-op because she had some of the prettiest red chard I have seen in a long time.  I'm planning to use it rather like a grape leaf to make a quinoa stuffed chard appetizer.  It is steamed in lemon broth just like Greek Dolmas.  I like to serve mine on a platter of greek olives, feta shards and crusty bread with some olive oil for dipping.  Its hard to find better food than that! 


Pretty amazing looking produce huh?

Anyway, I am making that today along with Polenta toasts with Wild Mushroom Medley, Roasted Vegetable Quesadillas and if I have time...baba ganoush.  That will complete the photos for the appetizer chapter of my book. 

This morning I made Papaya Orange Creamsicles and I have to say, they turned out fantastic!  The recipe is SO simple and only requires a few ingredients.  The "cream" in this instance is coconut milk, making these luscious frozen pops completely vegan AND completely insanely delicious!

Papaya Orange Creamsicles


Makes 6 (2 ounce each) frozen creamsicles

  • 1 extra large navel orange, zest before peeling and reserve zest - removed only the oil orange part of the skin with a paring knife and leave some of the white
  • 1 cup frozen papaya cubes (or fresh...you'll just have to wait longer for the creamsicles to freeze)
  • 1/2 cup unsweetened organic full fat coconut milk
  • 2 teaspoons reserved orange zest
*Note :  I did not add any type of sweetener to these because the orange and ripe papaya is sweet enough for my taste.  If you want them sweeter, try adding a little raw blue agave or stevia.

  1. Run peeled orange through a juicer.  Place orange juice, papaya cubes and coconut milk in the blender.  Blend until smooth.  Pour into a bowl and stir in reserved orange zest.
  2. Pour mixture into 6 (2 ounce) moulds of choice.  If you  have used frozen papaya, the mixture will be thick enough to stand the lollipop stick in.  If not, freeze for 20 minutes or until stick will stand straight in mould.  Freeze until completely firm.
If desired you can serve with some strained raspberry puree.  I add 1 pint of fresh raspberries to my blender with 2 tablespoons of raw coconut tree syrup (you could also use raw blue agave).  Blend until pureed; strain out seeds and served with Creamsicles.


This was RIDICULOUSLY GOOD!


(c) copyright Jill Anderson
The Homegrown Gourmet

Friday, April 23, 2010

Frittering Away The Time

Sundays are always our day to sleep a little later and have a "sit down" breakfast.  My husband dearly loves breakfast and nothing makes him happier than one that involves something sweet and or fried!  This past Sunday I was in a quandry about what to make.  I've made Palacinke (Serbian Crepe's) till they are coming out my ears because everyone always requests them when them come to visit.

Waffles are nice but I did that too not long ago...vegan waffles none the less because we all know my issues with eggs by now!  As is usually the case with me, I open the fridge or the pantry and stand there stupified waiting for inspiration to hit me up the side of the head like a brick.  It did just that over a carton of ricotta cheese and some organic fuji apples. 

This culinary epiphany resulted in some Apple Fritters in a cinnamon-spiced batter that are pan fried in coconut oil and topped with Maple Ricotta Cream and more cinnamon.  To say that they were a hit would be putting it mildly.  Hmm...I should have probably gone in for the kill on that new vaccum cleaner I've been drooling over while he was all hopped up on that carbohydrate endorphin rush.  There's always NEXT Sunday and if I fried a little BACON to go with it...I could probably get Prada handbag!

Where was I?  Oh yes...frittering away the time gabbing about vaccum cleaners and breakfast!  This is actually a pretty simple recipe.  I opted to keep the batter undersweetened because the maple ricotta cream (and extra syrup on top) provide more than enough sweetness.  Don't over cook the fritters or the apples will be soggy inside and make your batter fall off...other than that or burning them...you can't really mess up! I prefer frying mine in cast iron because I grew up in Tennessee and that's what everybody used but you can use any vessel you choose.

Apple Fritters with Maple Ricotta Cream


  • 3 large cage free organic eggs
  • pinch of kosher salt
  • 2 tablespoons organic cane sugar ( I use Florida's Naturals)
  • 1 tablespoon melted extra virgin organic coconut oil
  • 1 teaspoon ground cinnamon
  • 1/2 cup unbleached all purpose double fiber flour or spelt flour
  • 2 teaspoons baking powder
  • 1/4 - 1/3 cup organic 2% milk (non-dairy milk will work also)
  • 5-6 organic fuji apples halved, cored and then sliced 1/4" thick
  • additional flour for dredging apples
  • 1 cup organic Ricotta Cheese ( you may not be able to find this part skim)
  • 2 Tablespoons pure maple syrup plus more for drizzling
  • extra cinnamon to sprinkle on top
  1. In a large bowl, beat eggs with a whisk until foamy.  Beat in salt, sugar and coconut oil; set aside.
  2. In a small bowl combine flour, baking powder and cinnamon.  Add the dry indgredients to the egg mixture all at once.  Stir to combine.
  3. Begin by adding 1/4 cup milk.  If batter is still to thick you may add more.  Batter should be thick enough to cling to apple slices; slightly thicker than pancake batter.
  4. Preheat cast iron skillet and add 1/4 cup melted coconut oil.  Dredge apple slices in plain flour and then dip into batter.  The flour will help the batter cling to the apples.  Once dipped, quickly transfer to hot oil.  Fry over medium heat until golden brown on first side, carefully turn and cook 2-3 minutes more on second side.  Drain on paper towels.
  5. Prepare Maple Ricotta Cream by combining ricotta and 2 tablespoons maple syrup in a small bowl.  Use to top fritters.  Add extra warmed maple syrup and sprinkle with cinnamon.
6 apples = 6 normal people or one husband!


I must admit...they do look rather tasty!


(c) copyright Jill Anderson
The Homegrown Gourmet


Wednesday, April 21, 2010

Anybody Want A Date?

Before you all run screaming in the other direction...I don't mean THAT kind of date!  I speak of course of the luscious, sweet little morsels of goodness...the Medjool Date.  Nature's candy.  I had quite the full schedule today so I only got three dishes made but three is better than none right?

For some strange reason, my eyelids went up like a roll shade at 5 am this morning and I couldn't go back to sleep.  If I were not already perfectly gorgeous I'd be concerned about the lack of beauty sleep!  My pledge to stick to raw juices and raw foods is going well but as an aside, I've always had trouble sleeping before the witching hour (usually long past).  Despite that, I generally wake up before 7 am.  Maybe its all this raw juce.  I feel like Jack LaLane...full of vitality.  Maybe I am evolving to a point where sleep is not necessary to my species?

In any event, here I sat at my desk pecking away at recipes while it was pitch black outside.  My husband's snores carrying from the other room sounded like a gorilla giving birth in the morning stillness.  Clearly, the carnivore has no issues with sleep! 

So, I started my day with just some straight orange juice from two huge navel oranges making a trip through my juicer.  There is NOTHING like it.  By the way, always cut off the colored rind before juicing citrus.  It's full of very stringent, bitter oils and will ruin the flavor of your juice.  Don't however, remove the pith.  I know that's weird because when you zest an orange or lemon you try to AVOID the pith but when you juice it, it makes the juice thick and creamy and there is not bitterness whatsoever.

About 10 am I popped the top on a tetra pack of coconut water and then juiced up some carrot, apple and Kale.  A friend of mine made the comment that her kids love it when she juices carrot and apple...they call it CRAPPLE.  I was wondering what you get when you add Kale to Crapple?  Maybe some questions are best left unanswered.

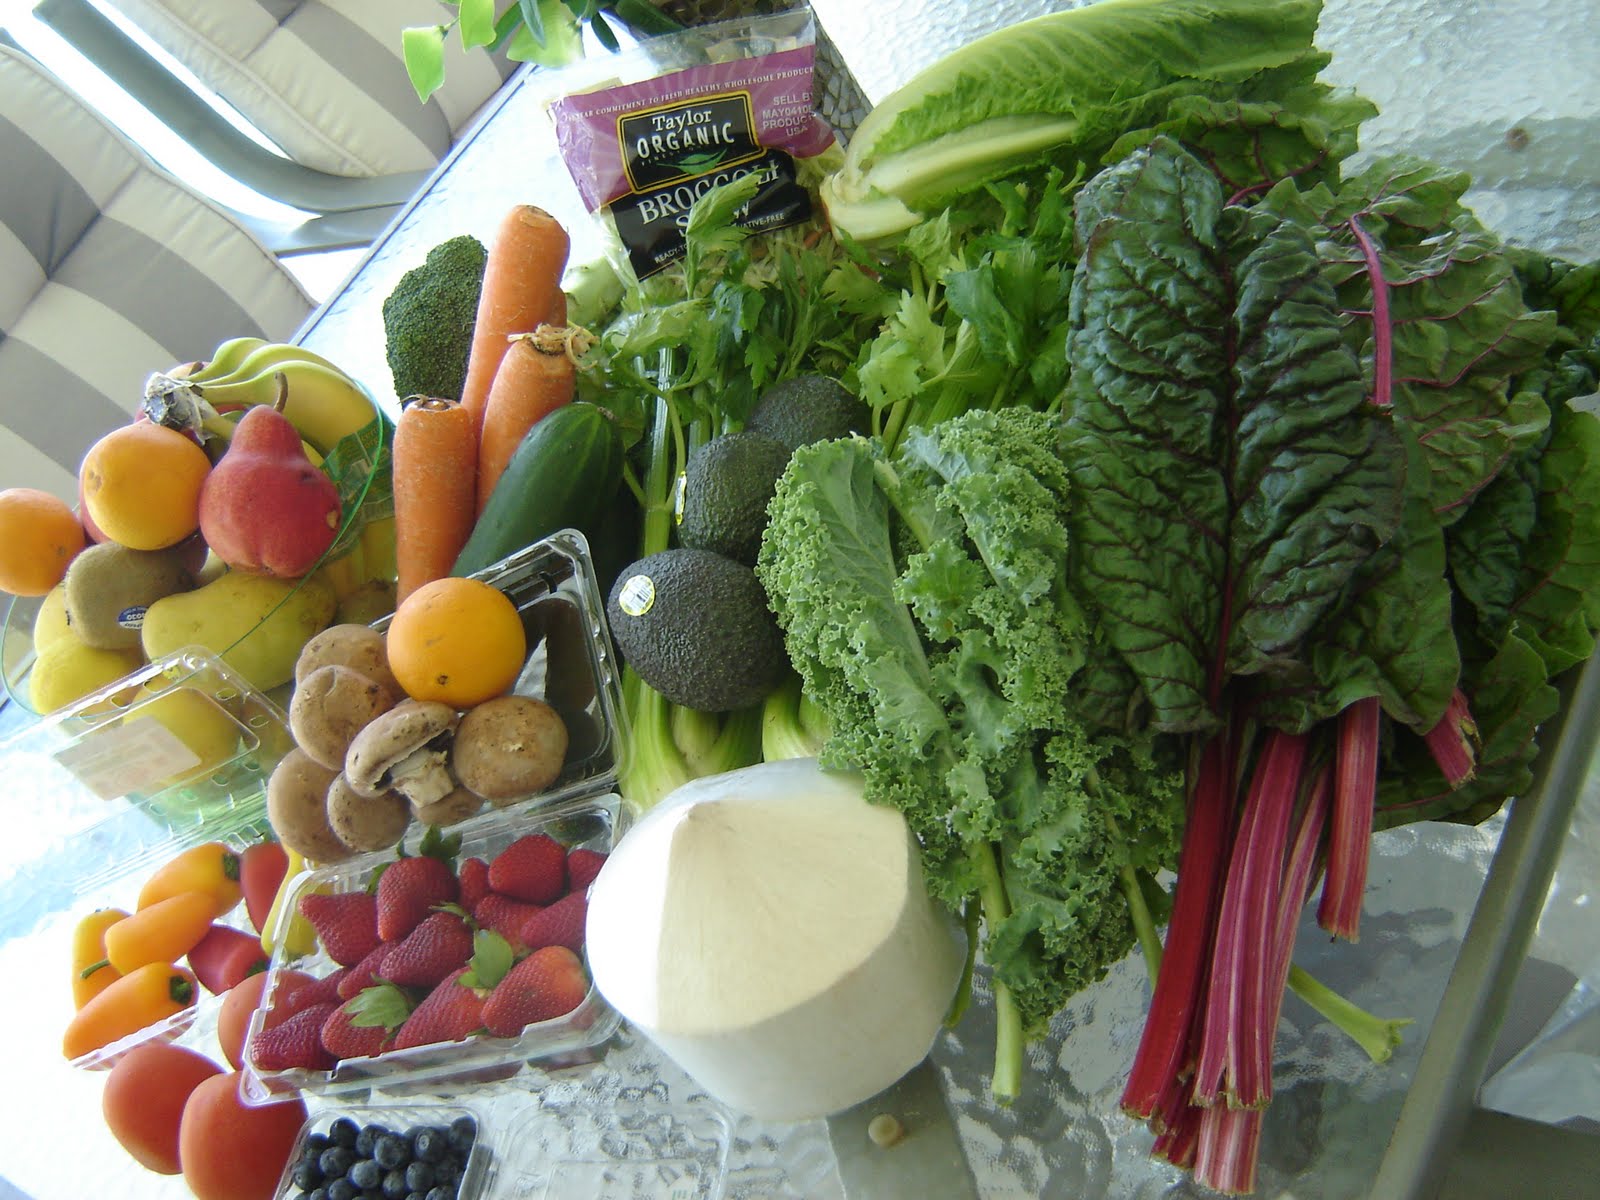
I had an appointment at 12:30 and I knew I'd be ravenous by the time I got home so I opened the vegetable bin and basically ran one of everything in there through the juicer.  Wow...the color of red bell pepper juice is so red that no matter what else you throw in there, the drink is still red.  I kind of made my own V-8...oops I guess I can't say that.  I'll call it my own Eight Veg cocktail;  red pepper, celery, cuke, parsley, carrot, kale, green beans and something else that I've forgotten...with a couple of slices of peeled lemon.  It was delicious.

I got home from my appointment around 2 and went to work straight away.  First, was my delicious and alkalizing Avocado, Cucumber and Parsley Soup.

This soup is served chilled and the texture is indescribable...it just melts on your tongue.
It is so simple to make.  Juice one huge handful of parsley with half an organic english cucumber (peel on) and a couple of slices of peeled lemon.  If you don't have a cup of juice add enough purified water to equal 1 cup.  Pour this mixture into the blender and add one ripe pitted and peeled Haas avocado.  Puree until smooth.  Season with sea salt and black pepper to taste.  I garnish mine with some diced seeded Roma Tomato.  It's fab!

From there I moved on to an arugula salad with tomatoes and onion, dressed simply with some homemade lemon tahini dressing.  I decided that I needed a little dessert and a pantry raid yielded dates, dried cranberries, dehydrated unsweetened coconut and raw chocolate nibs.  In the freezer I found almond meal, raw almonds.  This all went into my food processor and was ground until completely chopped and mixture was sticky enough to form into balls. 

You would use:

8-10 pitted medjool dates
1/2 cup dried organic cranberries
1/3 cup dried organic unsweetened coconut flakes
1/3 cup raw cacoa nibs (raw chocolate)
1/4 cup raw almond meal
1/4 cup raw almonds

Process until thoroughly blended.  Form into 18 (tablespoon sized) balls and store in fridge if you don't eat them all first!


Nature's own candy!


You can add flax meal or chia seeds to these to boost the protein and add more nutrients.

Lastly, I needed to finish my Wheatberry Pate' which I was reluctant to do since I know that I could easily eat the entire batch.  I started to talk about that a little yesterday but didn't give you the amounts.

Soak 1/2 cup of hard winter wheat berries overnight in purified water.  In the morning, drain the water and rinse the wheat.  Place it in a covered 1 quart sauce pot and cover with more fresh water.  Bring to a boil and simmer covered for about 1 1/2-2 hours for this amount of wheat.  Drain and cool.

To make the Wheatberry Pate:

Add the cooked wheat to the food processor with 6-8 pitted Medjool dates, 1/2 cup dried cherries, 1 cup of raw walnuts and a generous grating of fresh nutmeg.  Process until mixture becomes a thick paste.  Transfer to a container and refrigerate until ready to serve.  We have ours with apple or pear slices but you can eat this just as it is. 


I know it looks like a blob of goo...but its just ridiculously delicious and HARD to back away from once you get started.


These are crisp organic Fuji apples and they taste like ambrosia!

Now, its time for me to think about what I'm juicing for dinner.  The carnivore is at his weekly ritual of male bonding and blantant display of gross manliness (dart tournament) so I don't have to roast some poor slain animal tonight. 

Just a little sump'n sump'n to make you smile (at least it did me), I came across a Far Side quote that I loved the other day.  This was written by the Far Side humorist, Gary Larson. 

"When their numbers had diminished from 50 to 8...the other dwarves began to suspect HUNGRY...."

What can I say...I'm slightly bent!

(c) copyright Jill Anderson
The Homegrown Gourmet

Tuesday, April 20, 2010

Tuesday Musings and Raw Almond Milk

Today my kitchen has been a flurry of activity.  As some of you may know, I'm working on making all the recipes in my vegan/vegetarian cookbook over...with photographs this time.  Fingers remain crossed that I have found a publisher!  Anyway, I seem to be cranking out dishes and photos faster than I can write the posts.  Of course, I'm not posting ALL my secrets because then no one would buy my cookbook.

I started out this morning by making more raw almond milk since I used up the last batch this morning in my green smoothie.  I had soaked the almonds over night so they'd be ready this morning.  In case anyone does not know how to make raw nut milks...I'll explain.  Its terribly simple...not really a recipe at all.  I will give a bit of advice on raw nut milks though, they spoil quickly!  I only make what I know I can use in 3 days...MAX!  Beyond that, they begin to get a funky smell and even funkier taste and thats just...well...bad ju ju. 


To make about 2 cups of raw almond (or any nut) milk, I start with 1/2 cup of whole unpeeled raw organic almonds.  Put them in a glass bowl (plastic may leech BPA which again is bad ju ju) and pour distilled water to cover the almonds.  I do this in the evening and soak them overnight so I can make the fresh almond milk in the morning.  If you soak much longer than 12 hours you run the risk of the nuts becoming rancid or sprouting.  Drain the soaking water and rinse the nuts.  Place them in your blender and fill the blender to the 2 cup (up to 2 1/2 cups for this amount of nuts) mark with fresh distilled/purified water.  Blend at high speed until the nuts are pulverized.  The pieces should just be tiny flecks. 


You'll want to have a strainer, a large bowl for it sit over and some clean undyed, unbleached cotton cloth.  Place the strainer on the lip of the bowl and line with the cotton cloth.  Pour the nut milk into the cloth and allow to drain as much as will pass though. 


Bunch the cloth up and twist until the nutmeal is squeezed into a ball.  Just keep twisting and squeezing until you cannot wring out any more milk.


Pour the fresh raw milk into a glass jar with a lid and place in fridge right away.  Use within 3 days.  Don't waste the left over nutmeal.  You an spread it out on a cookie sheet and dry it in your oven or dehydrator and bake with it or use for whatever other purpose you can dream up!


Make sure to shake the jar before pouring.  As homemade raw almond milk is not homogenized, it seperates as it sits.


Believe it or not, this milk is extremely creamy...creamier in fact than the store bought sweetened almond milk I think.  Plus, it really TASTES like almond milk and not sugar.  I hope you'll try making your own sometime even if you only do it once...just to taste the difference!

Once I had my almond milk made, I set about putting out some wheatberries to soak.  My ex-husband's mother used to make this stuff with ground wheat berries, powdered sugar, ground walnuts and nutmeg.  I'm probably spelling it wrong but they called it Zhito..Zito...I can understand Serbian but I can't read or write it!  Anyway, it was for Slava (families patron saint day) celebration and the Orthodox priest would come to the house and bless the bread and wheat.  After the wheat was blessed then everyone who stopped by had to take a spoonful of the wheat and a little chunk of the bread (with a generous amount of homemade pear brandy at my father-in-law's behest). That wheat was absolutely delicious.  My ex's sister and I used to eat the left over wheat COLD right out of the fridge the next morning.  It wasn't particularly good for you with all the powdered sugar that went into it but the basic concept is a good one.  I just worked on it a little to make it healthier. 

I soak my wheat at least 8 hours, drain and rinse and then cover with water in a pot and simmer until it's tender;  about 3 hours depending on how much wheat you are cooking.  Next I drain and cool the cooked wheat and put it in my food processor with raw walnuts, dried cherries and a few pitted fresh medjool dates.  Then you grind that stuff to a fair-thee-well!  It comes out kind of like pate.  In fact that is what I call it...Wheatberry Pate.  So...I've got wheat simmering for that.  I suppose I'll get it made tomorrow and post the pictures.  It makes a fabulous spread for apple or pear slices or heck...just eat it by the spoonful right out of the fridge.

Next I moved onto Chickpea and Bulgur Croquettes which I serve with a Roasted Red Pepper Tahini Sauce.  Can I just say...they turned out AMAZING!  If I wasn't doing a raw juice detox for the next couple of weeks you can belive I'd have been stuffing my face with these!


Having made these many times before, I know how good they would have tasted!  That Roasted Red Pepper Tahini Sauce is the nectar of the Gods!


Both of these recipes will be in my cookbook.  This dish is completely vegan by the way.

Next on the agenda was getting something on for the carnivore to devour when he gets home from work.  I picked up some beef short ribs at the grocery this morning and am making a tagine of beef short ribs with them.  They've been in the oven for a couple of hours now...braising away in rich sauce made from the pan drippings, beef stock, dried apricots, prunes, currants, preserved lemons, Moroccan spices, slivered almonds and a couple of cinnamon sticks.  I KNOW the aroma has reached across the canal because the dogs in the house directly across the water from mine are sitting on the boat dock with their noses in the air and looking like they are considering a swim!  My dog is basically lying in front of the stove, nose and ears twitching trying not to look too expectant in the hopes I will THINK she's not interested and leave something unguarded.  I've got her figured out.....

Now I'm just chillin'...like a villian cuz I'm old and not willin'...to work anymore cuz I'm spillin'...stuff on the floor and its conjealin'...         Ah well...guess another career as a hip hop artist is out huh?? 

I'd do it but I'm afraid they would make me change my image and well...Aging Psycho Gypsy is a look I've obviously perfected!


(c) copyright Jill Anderson
The Homegrown Gourmet

Monday, April 19, 2010

Energize Your Day!

I have a lot to do today.  First I plan to hit the gym this morning for an hour of step class.  Sometimes I let my schedule crowd the gym out and I need to stop doing that.  Especially because I need to compensate for all the time I spend sitting on my bum writing!  I'm strictly a morning exerciser... if I don't get it in before noon its not happening. 

Secondly, I need to make a quick stop at the one and only pitifully inadequate health food store I can find on Cape Coral to pick up a tub of Vegan Protein powder.  I will say this about the place...even though they barely have anything, they DO carry a fabulous brand of vegan protein powder made from hemp, chia and pea blended with brown rice protein.  It's gluten-free, soy free, whey and egg free, non-gmo and no sugar (or fructose which is a big issue with a lot of cheap protein powders).  This stuff is called Life's Basics and I get the natural vanilla flavor.  It blends well with everything.  If you are a vegan (or if you just don't want to consume a bunch of soy junk and cheap whey), I encourage you to try this stuff.  I bought a couple of sample packets at first to see if I was going to like it.  Here's what they look like.

rich in omega 3-6-9 , calcium and fiber...this stuff is terrific.

I actually don't use  a whole packet all at once unless I just want a straight protein shake.  Usually I encorporate a few tablespoons into my Superfood Raw Green Smoothie.  Yeah yeah... I know it's got spinach in it but honestly, you can't taste it.  It just tastes good.

Here is the recipe: 

Superfood Raw Green Smoothie


1 cup raw almond milk (I will post directions for this later)
2 Tablespoons Life's Basics vegan protein powder (vanilla)
1/2 large banana
1 teaspoon pure acai fiber
1 tablespoon raw wheat germ
1 1/2 cups or two handfuls organic baby spinach
1/2 cup young coconut meat **
1 cup frozen papaya

Put everything in the blender and buzz until thick and smooth. 

**I always buy fresh organic Thai Coconuts for the water inside.  I love the meat too but I don't always eat it at the time I drink the juice.  I generally crack them open, scoop out the meat and freeze it in containers for later use.  This works great for smoothies.

If you happen to be sprouting any sunflower seeds, a handful of those won't hurt this drink either!

Anyway, that was breakfast and it really energized me for my workout.  I did stop and pick up a new tub of protein powder along with a couple of other faves from the healthfood store...namely raw cacao nibs, dried cherries, wheat berries and something new.  I found something called raw coconut tree sap.  It's supposed to be low glycemic and pure tree sap...not refined like most of the agave is.  I'm anxious to try it out.

Today is co-op pick up day as well so I have that stop to make.  Every monday my organic produce order comes in and I have to run over to Ft. Myers to pick it up.  I did come home after the healthfood store though to make myself a bit of lunch.  I've decided I need to use my juicer more and get back to a primarily vegan diet.  I will continue to cook both vegan and non-vegan foods because I write cook books and articles and not everyone who reads them is a vegan or vegetarian. 

My lunch today was a big glas off carrot apple juice that had a handful of kale thrown in for good measure.  Don't panic...you can't even taste the kale.  But since I already had kale washed and torn, I did decide to make a batch of kale chips to go along with it.  This is about the easiest thing in the world to make.  Place the torn kale on a parchment lined baking sheet in a single layer, spritz with olive oil, sprinkle with salt and bake at 350 degrees for about 10 minutes or until its shriveled up and crisp.  It's just so delicious!  I had a big fat, sweet medjool date for my dessert.  I'm really TRYING to eat mostly raw foods for the next few weeks because I feel...oh what's the word I'm looking for?  It's not exactly toxic but certainly not optimum health.  I've really eaten too much grain products lately. 

Here's some pictures of my energizing lunch.


one of my favorite snacks...crispy Kale "chips"

I still  have a couple of articles that I really need to get written today and I'd like to mop the floors before we leave for our poker game tonight.  I'm thinking about making another glass of juice for some more energy!


(c) Jill Anderson
The Homegrown Gourmet

Saturday, April 17, 2010

I'M BAAAA-CCCK!!!

Well, wasn't that lovely?  Let me back up about a week and a half and tell you about my latest PC adventure!  As everyone who reads any of my work knows, I have zero patience for my computer anyway.  It is the bane of my existence really.  I write so unfortunately, I'm always sitting here..waiting impatiently for my computer to do what I want it to do immediately...which almost never happens.

So, here I sit last Wednesday morning, writing an article for the Cape Coral Daily Breeze and right in the middle of it I am rudely interupted by a flicker, a slow screen flash and then a DOS screen.  I KNEW that could not be a good sign!  I'm staring stupidly at line after line of computer gibberish and wondering what happened when suddenly...there it is...THE BLUE SCREEN OF DEATH! 

To say that I broke down and blubbered like a baby would be an understatement.  The blue screen of death is a writer's worst nightmare because the first thought that goes through your head is "when was the last time I backed up my files?"  In my case it had been (hanging head in abject shame) about six months.  I called the local computer fix it guy and he calmed me down, told me to bring my errant tower in to the shop and not make myself sick with worry. 

The short version...my computer was so full of viruses that it basically just shut down.  I erringly assumed that only people who surf porn get that many viruses.  Anyway, he explained to me that some smart worm or whatever it was insinuated itself in here and mimicked a windows screen asking me some question about my firewall in which "no" was actually the right answer to turn off my virus protection.  The good news is that he did indeed retrieve all my files, extracted and washed them, wiped my hard drive clean and then put my files back in.  I've just spent the last week putting back in all my programs and getting settings and auto fill stuff all back to the way I had it.  My computer is still the bane of my existence!

For those who follow my fan page on Facebook, you know that I am working on cooking my way through my vegan cookbook and taking pictures this time.  I actually MAY (keeping fingers crossed) have a publisher at long last and I'm not happy with the orignal files because I used little clip art renderings instead of real pictures.  Who knew right?  Anyway, I have also decided to make the book Vegetarian AND Vegan.  The recipes that use dairy and eggs will have a note about how to adapt them to a vegan diet.  I have been posting 5-7 pictures of each dish and asking my fan page friends to vote on which one should go into the book.  Its actually kind of fun!

Needless to say, I'm doing a lot of cooking/messing around in my kitchen which cuts into my writing time.  So I do apologize but I'm offering a sneak peak of one of the recipes in the book as a peace offering for being a bad blogger the last couple of weeks.

I had a couple of perfectly ripe avocados sitting on my counter just begging to put into a recipe today.  I love guacamole but its something that everybody and their brother makes.  My Sweet Avocado Butter is quite lovely but again...its old news.  Yesterday, I actually picked 6 strawberries off my OWN container garden vines so I decided to make Strawberry Avocado Salsa.  The twist is some freshly squeezed Florida orange juice and strips of zest.  I added a tiny squirt of raw agave and it was heavenly.  Here is the recipe.

Strawberry Avocado Salsa


  • 6-8 fresh ripe organic strawberries
  • 1 ripe haas avocado
  • two tablespoons freshly squeezed orange juice
  • 1 teaspoon freshly squeezed lime juice
  • 2 teaspoons orange zest strips
  • 1 teaspoon (or to taste) raw agave syrup
  1. Cut strawberries into chunks.  Peel and dice avocado.  Place in a small bowl and toss gently with orange juice, lime juice, orange zest and agave.  Enjoy with easy baked corn chips.
I buy fresh corn tortillas, cut them into wedges and spread out in a single layer on a baking sheet.  Bake at 400 degrees for 8-10 minutes or until golden and crisp.  You can spritz with a little olive oil if desired before baking.

I don't recommend making a big bowl of this salsa ahead of time.  Make just what you are going to eat for two reasons.  Number 1, oxidation makes the avocados turn brown no matter how much citrus you put on them.  Number 2, you get the maximum amount of nutrients from fresh fruits and veggies if you eat them as soon as they are cut. 

Here are a few more pictures. 


this stuff is addicting...it's so fresh and fabulous!


Doesn't that make your mouth water?


(c) copyright Jill Anderson
The Homegrown Gourmet

Sunday, April 4, 2010

Happy Easter!

Happy Easter Everyone!  I hope you all had a wonderful day.  Our weather was absolutely perfect today.  I did most of the work for my Easter dinner yesterday so today all I had to do was bake the ham and pop my sweet potatoe casserole in the oven. 

As most of you know, I don't eat pork but my husband certainly has no compunctions about doing so.  If you actually ASK a man what he wants to eat for any holiday meal he'll say either one of two words...GRILL or PORK.  Often the two go TOGETHER.

The grill wasn't mentioned here but the pork was...in the form of a ham...for Easter.  How original huh?  If I'd had my way it would have been a Frenched Rack of Lamb with a sea salt and fresh rosemary crust...sigh!  At the very least if I MUST make a glazed ham, I have to some kind of gourmet twist on it.  Canned pineapple rings, maraschino cherries and a whole clove stuck in the middle makes me feel queasy. 

I did a very simple but delicious marinade made of thawed frozen blackberries, brown sugar and Dijon mustard.  It made a beautiful deep purple, thick sticky glaze.  To make it simply place 2 cups thawed frozen blackberries in the blender.  Blend until smooth, strain out the seeds.  Pour the juice into a small saucepan, add 1 cup brown sugar and 1-2 tablespoon Dijon mustard (to taste).  Bring to a boil, reduce heat and simmer until mixture is reduced by about half, thick and sticky.  Use to baste ham with the cooking juices about every 20 minutes.


this is the color or the unbaked glaze...isn't it beautiful?


This isn't burnt...it's actually a very dark purple, sticky GOODNESS!


As the ham bakes, the spiral slices seperate and everytime you baste more glaze on, it runs down between the slices.


It sliced beatifully and the meat is juicy with a sticky "crust" on the outside


Close up of that glorious glaze!


For a simple and delicious side dish try making my Oat Crunch Roasted Sweet Potato Casserole.
You will need:

4 large sweet potatoes
a little coconut oil for rubbing the skins before roasting
4 tablespoons melted organic butter
1/2 cup organic brown sugar
1/2 cup organic 1/2 and 1/2
2 large cage free organic eggs, beaten
1 teaspoon ground cinnamon
1/4 teaspoon kosher salt

Preheat oven to 400 degrees.  Coat sweet potato skins with some melted coconut oil and roast until soft.  When cool enough to handle, peel and discard skins.  In a large bowl combine melted butter and brown sugar; add cooked sweet potatoes, kosher salt and cinnamon.  Beat with electric mixter until smooth.

Add 1/2 and 1/2 and beaten eggs; blend well.  Pour mixture into a buttered 9x9 casserole dish.  Prepare crunchy oat topping. 

4 tablespoons slightly chilled butter
1/2 cup unbleached all purpose flour
1/2 cup brown sugar
3/4 cup rolled oats
1 teaspoon cinnamon
pinch of kosher salt
1/3 cup chopped pecans

combine all ingredients except pecans in a large bowl.  Work mixture with fingers; crumbling until butter is thoroughly distributed.  Mixture will be slightly clumpy.  Sprinkle top of casserole with oat crumb mixture.  Bake at 350 degrees for 30 minutes or until crumble top is golden.  Casserole will puff slighlty.

This dish can be made a day ahead and baked later.


A close up of Oast Crunch Roasted Sweet Potato Casserole

As we all know,  Jill does NOT do eggs...bad bad ju ju...but I did make some for the hubs.  There are some sweet green buttered peas there too.  I know...this meal uses far more sugar than I normally cook with.  What can I say?  He DID pass out in a food coma after lunch though which gave me some time to catch up on my writing without having to listen to the television blaring!  Here are a few more pictures of his Easter Dinner.


Happy Easter!


(c) copyright Jill Anderson
The Homegrown Gourmet

About Me

My photo
Fort Myers, Florida, United States